Last Updated on August 15, 2025 by Nico
If you’ve ever wandered through the skincare aisle, overwhelmed by rows of pricey bottles of face serum, you’re not alone. This homemade face serum recipe uses nourishing, natural ingredients and is simple to make.

Homemade face serum is so easy to make and in my opinion, it’s even more luxurious than the expensive store-bought options. In this post, I’ll show you how to make a homemade face serum that works for a wide range of skin types – from sensitive to oily, mature to acne-prone – and offer tips for choosing the best carrier oils and active ingredients based on your needs.
What is a face serum?
Face serums are lightweight, concentrated recipes that help to refresh and moisturise your skin. Unlike more general lotions and moisturisers, face serums tend to be packed with super-nourishing ingredients that sink into the skin quickly. Making your own natural face serum gives you control over what goes in your final serum. This is especially important if you have sensitive skin or want to avoid synthetic additives (like we do!).
Which oils to use
For dry skin or mature skin
Avocado oil
Jojoba oil
Argan oil
Fractionated coconut oil
For oily skin or acne-prone skin
Jojoba oil
Hempseed oil
For sensitive skin
Sweet almond oil
I personally avoid using olive oil because I find it far too heavy on my skin, but it is deeply nourishing.
DIY face serum recipe
What you’ll need
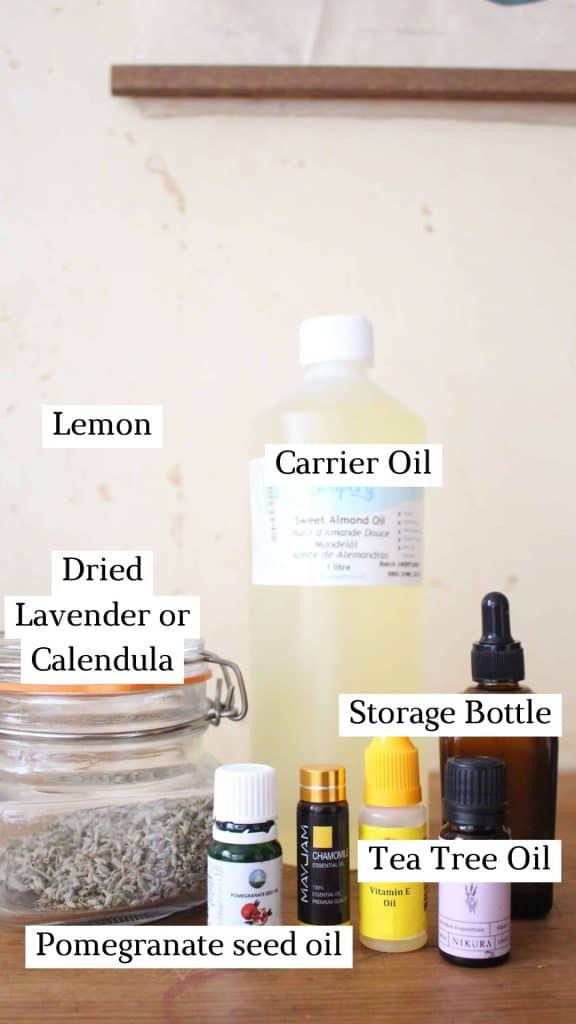
Ingredients
Base oil of your choice – which kind of oil you choose depends on your skin type. I’ve listed good oils for different skin types (such as dry skin, oily skin, etc) above this section. I like using jojoba oil but you can also use good quality olive oil, sweet almond oil, avocado oil, or fractionated coconut oil)
Rosehip oil (can help boost collagen production and is good for fine lines and wrinkles, as well as dark spots)
Vitamin E oil (antioxidant support)
Tea tree oil (optional: can be helpful for acne-prone skin)
Pomegranate seed oil (contains vitamin E and anti-inflammatory properties)
Optional – Essential oil of your choice (like rose, roman chamomile, or lavender: for scent)
Tools
Small glass bowl
Whisk or spoon
Dark glass bottles with droppers (for storage) – I like these
Instructions
The first step is to infused your oil. I like to infused my oil with calendula for this recipe, because it can help with redness and mild irritation. Here’s how to make your own calendual oil (but you can follow the same process to make a different type of infused oil.
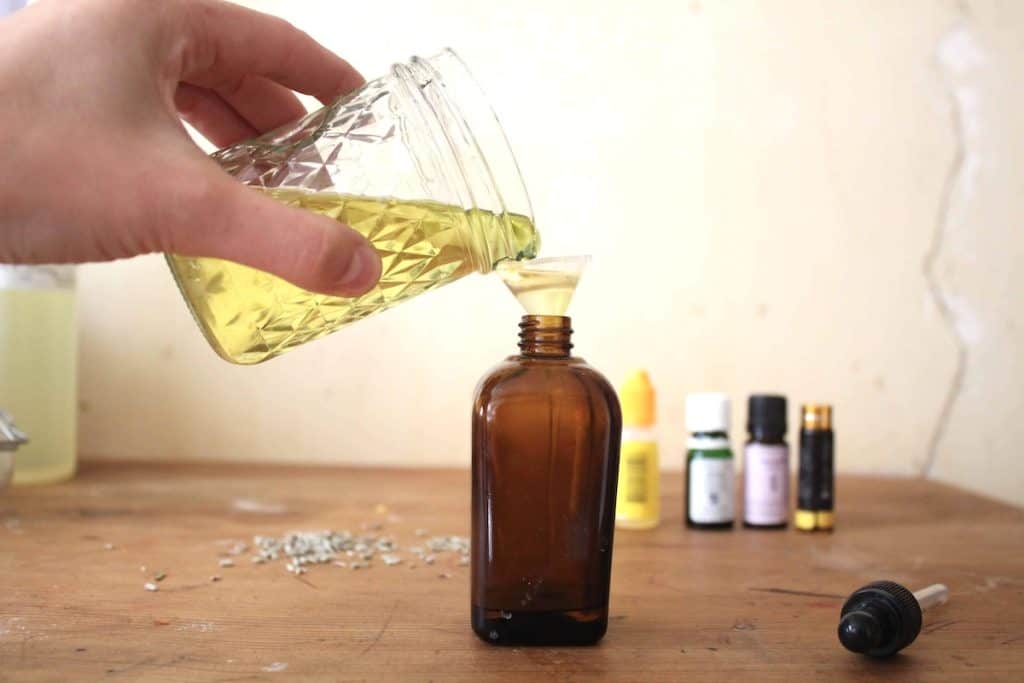
Once you have your infused oil, wash and dry all of your supplies.
In a small bowl, mix all of your ingredients together. These carrier oils form the base of your serum.

Stir in your vitamin E oil and any essential oils you’ve chosen. For sensitive skin, stick to gentle oils like chamomile or skip essential oils entirely.

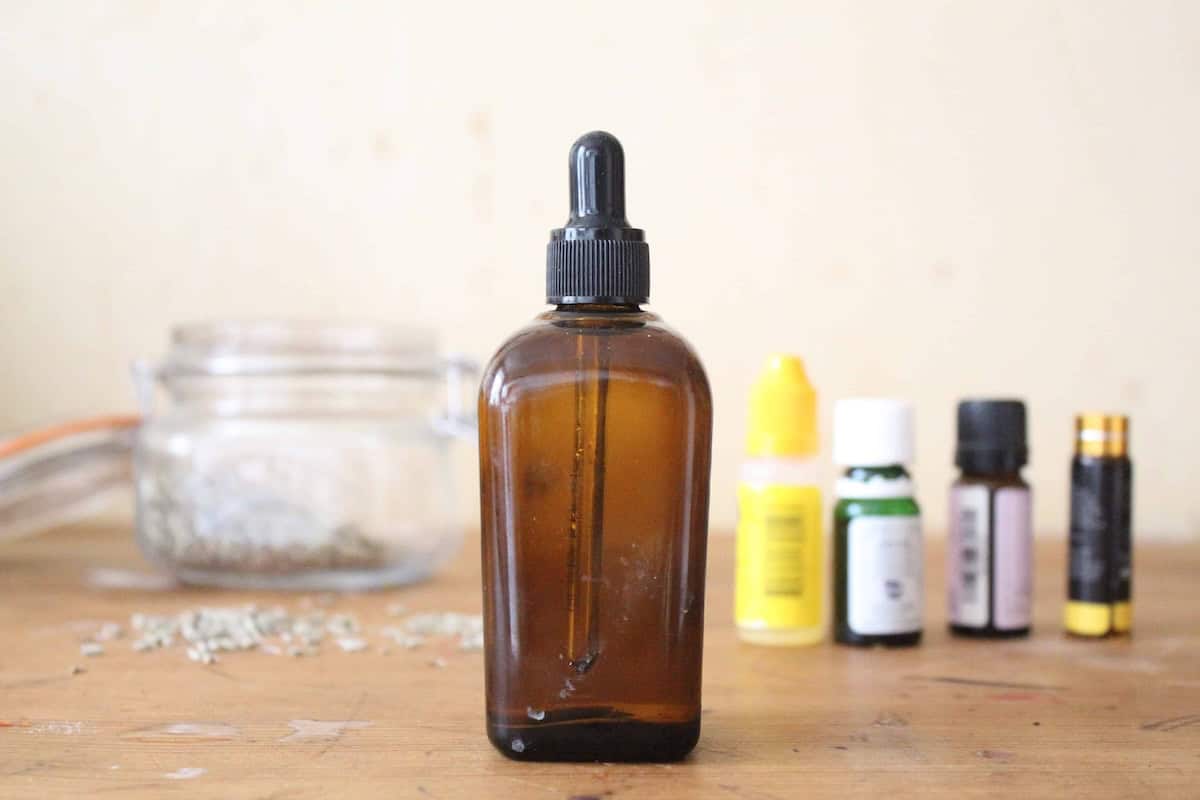
Pour the mixture into a dark glass dropper bottle to protect it from light, which can degrade some of the oils over time.
Label your bottle with the date and store it in a cool, dark place away from direct sunlight. Shake gently before each use. That’s it! You’ve made your own DIY face serum.

How to use the homemade face serum
This is an easy serum to add to your skincare routine. You can use it after using a cleanser and toner, and apply 3–5 drops to your face and neck while your skin is still slightly damp. Gently press it into your skin with your palms rather than rubbing. You can use a moisturiser afterwards, if needed.
Use your homemade facial serum once daily at first, ideally in the evening. You can increase to twice daily depending on how your skin responds. Always do a patch test before applying new products to your face, especially if you have skin conditions.
How long will it last?
When stored in a dark glass bottle in a cool place, your serum should last up to 6-12 months. The shelf life can vary depending on the oils you use. Jojoba oil and vitamin E oil both help it to last longer!
Easy DIY Homemade Face Serum Recipe
Ingredients
Equipment
Method
- The first step is to infused your oil. I like to infused my oil with calendula for this recipe, because it can help with redness and mild irritation. Here's how to make your own calendual oil (but you can follow the same process to make a different type of infused oil.
- Once you have your infused oil, wash and dry all of your supplies.
- In a small bowl, mix all of your ingredients together. These carrier oils form the base of your serum.
- Stir in your vitamin E oil and any essential oils you’ve chosen. For sensitive skin, stick to gentle oils like chamomile or skip essential oils entirely.
- Pour the mixture into a dark glass dropper bottle to protect it from light, which can degrade some of the oils over time.
- Label your bottle with the date and store it in a cool, dark place away from direct sunlight. Shake gently before each use. That’s it! You’ve made your own DIY face serum.
Leave a Reply