Last Updated on October 26, 2024 by Nico
Ready in under 30 minutes, making beeswax wraps without resin is simple to do. These homemade beeswax wraps help food stay fresh for longer and make storage simple.
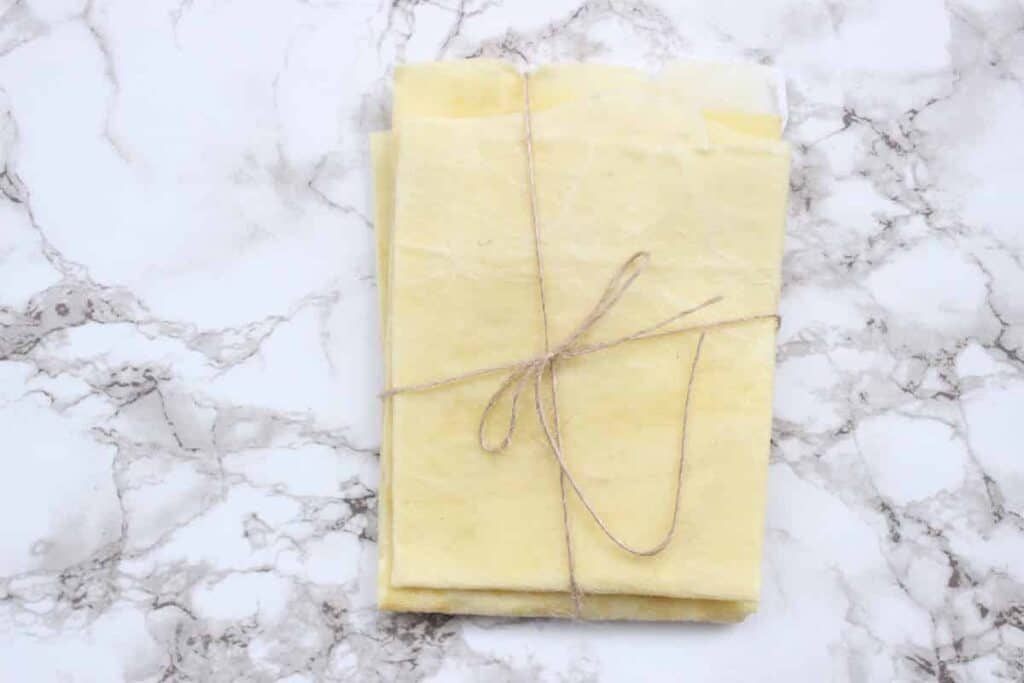
Homemade beeswax wraps are straightforward to make. Resin can be added to the beeswax to increase the stickiness of the wraps, but it is not necessary. These wraps are a great option if you’re looking for nontoxic kitchen swaps.
Homemade beeswax wraps are economical because they can be used over and over again. They also give you a way to avoid buying plastic wrap and repurpose materials that you probably already have on hand.

Watch The Video
Tips
If your beeswax wraps lose their pliability, you can simply melt more beeswax onto the fabric. I do this every 6 months or so. After a year though, I like to remake my wraps.
You can sew a zigzag stitch around the fabric to prevent any fraying – but it’s not necessary. And I like the look of the raw edges!
Beeswax wraps made without resin are less sticky. This means that you may need to hold your wraps down around your bowls using a rubber-band.
FAQ
Simply use a cloth to rinse the wraps with cold water and soap. It’s best to avoid using hot water because it could cause the wax to melt.
Resin is added to beeswax wraps to make the wraps more sticky. This allows them to stick down around the sides of a bowl when being used. But resin isn’t necessary to use in homemade wraps – the wraps will just be less sticky.
You want to use a natural fibre to ensure the beeswax soaks into the fabric. Some good options are 100% cotton, linen, or hemp.
Beeswax wraps should not be used to store raw meat. This is because beeswax wraps should not be cleaned using hot water, which you would want to do if you used them to store raw meat.
Beeswax wraps can be used for about a year before being replaced.
No – it’s best to use beeswax wraps for cool food only because hot food (or dishes) could melt the wax.
Supplies
Beeswax – either pastilles or grated (just use a cheese grated) – I used these pellets.
Scissors
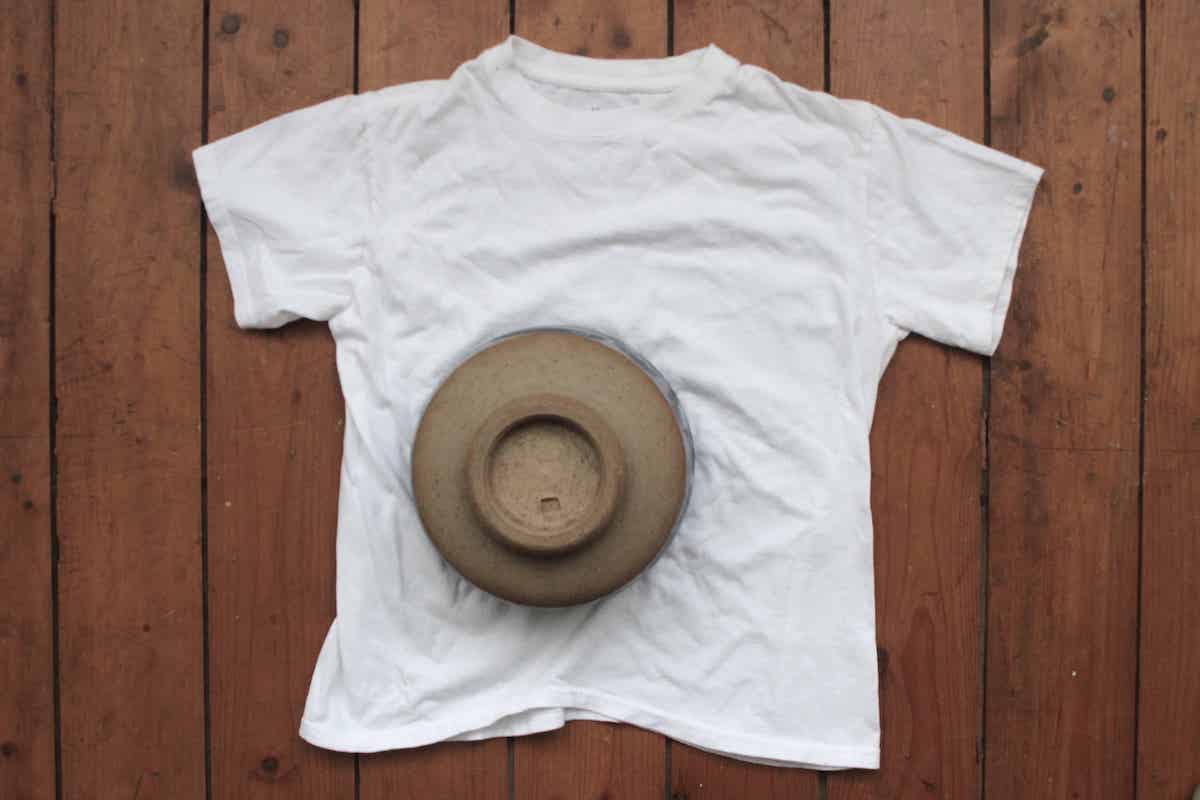
Fabric – I repurposed a shirt to make my wraps
Baking Trays
Parchment Paper
Instructions
Time needed: 30 minutes
- Buy fabric or repurpose fabric you have at home
I used an old cotton shirt that I no longer wear for my wraps. If you’re also repurposing your fabric, wash and dry the fabric before making the wraps.

- Prep the beeswax
If you’re using a solid chunk of beeswax, use a cheese grater to grate the beeswax into small pieces.
- Preheat the oven
Pre-heat the oven to 215 Fahrenheit or 101 degrees Celsius.
- Cut out the wraps
Cut the fabric into the size you would like to have. I put my bowls on top of my fabric and measured 4 inches larger that the circumference of the bowl to make sure there was enough fabric to cover the top and sides of my bowls.
- Prep the baking trays
Put the cut fabric onto the parchment paper-lined baking trays.
- Add the beeswax
Sprinkle the shredded beeswax or beeswax pastilles onto the cut fabric. Make sure to spread them evenly across the entire piece of fabric.

- Optional – add jojoba oil
While it’s not necessary, you can combine the beeswax with coconut oil or jojoba oil to increase the pliability.
- Put the trays into the oven
Put the baking trays with the fabric into the pre-heated oven for 15-20 minutes. You should leave the wraps in the oven until the beeswax is completely melted.

- Allow the wraps to cool
Once the beeswax is melted, remove the baking trays from the oven and allow them to sit for 5 minutes with the wraps still on the trays. And that’s it!

These will last about 100 uses or about 1 year. After that simply remake the wraps using new fabric.

This post may contain affiliate links, which means I make a small commission at no extra cost to you. As an Amazon Associate, I earn from qualifying purchases.
What to read next
What To Use Instead Of White Vinegar For Cleaning
All-Natural Simple Castile Soap Hand Soap Recipe
How To Make A Pillow Cover Without A Zipper – Simple Tutorial
MUy detallada y clara la explicación del proceso. Muchas gracias!
🙂